
This post may contain affiliate links. Read the full disclosure here.
The countdown to Christmas is honestly one of my favorite parts of the holiday season! There’s something so magical about watching my three boys race to open each day’s surprise, and creating a DIY advent calendar has become one of our treasured family traditions.
The store-bought ones are nice, but making your own adds that personal touch that makes the holidays feel extra special!
If you’d rather give one surprise instead of 24, these creative Secret Santa gift ideas offer plenty of festive alternatives!
I know what you’re thinking – who has time for complicated craft projects when you’re juggling three kids, holiday shopping, and everything else on your plate? That’s exactly why I’ve put together these simple DIY advent calendar ideas that you can actually finish in a weekend! Whether you’re crafty or not, these projects are totally doable and will create memories that last way longer than any store-bought version ever could.
Paper Bag Village Advent Calendar
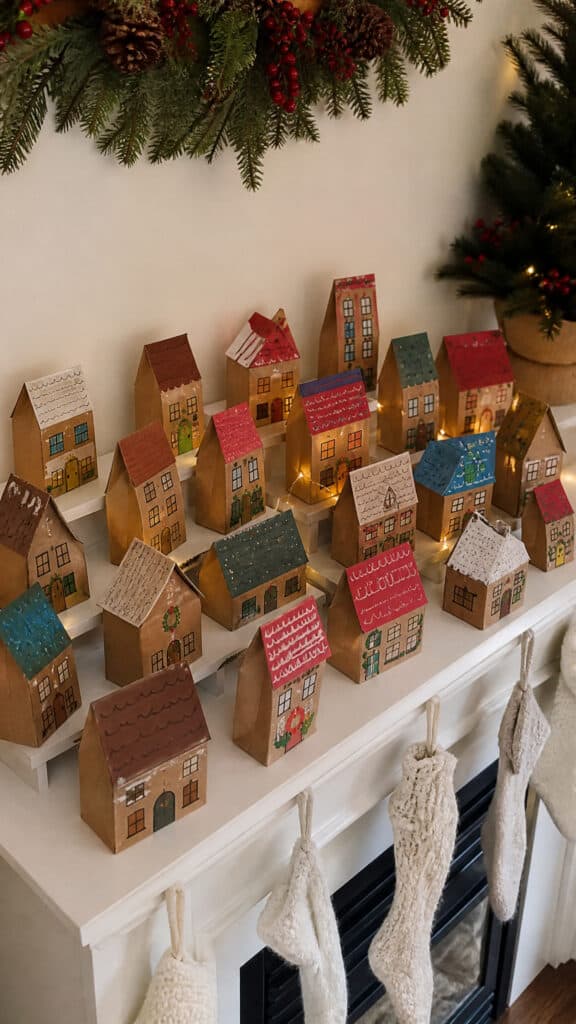

This is hands down one of my favorite DIY advent calendar projects because it’s so forgiving and the boys absolutely love it! You’ll need 24 small paper bags (lunch bags work perfectly), some markers or paint, and a bit of creativity. The best part? Each bag becomes a little house that you can arrange into a cute village scene!
Start by decorating each bag to look like a tiny house or building. My boys helped me draw windows, doors, and even added little details like wreaths and snowflakes. We used construction paper scraps for roofs and glued them to the tops of the bags. Once they’re decorated, number each house from 1 to 24 using stickers, stamps, or just a marker!
Arrange your paper bag village on a mantel, shelf, or even tape them to the wall in a fun pattern. Fill each bag with small treats, toys, or activity cards. I love mixing candy with non-food items like small figurines, stickers, or notes with fun activities we can do together. The village grows throughout December as the boys open each house, and it becomes such a cheerful decoration!
Pro tip: If you want to reuse this year after year, laminate the bags or use small gift bags with handles that are sturdier. We’ve used ours for three years now and they still look great!
Envelope Wall Tree Advent Calendar
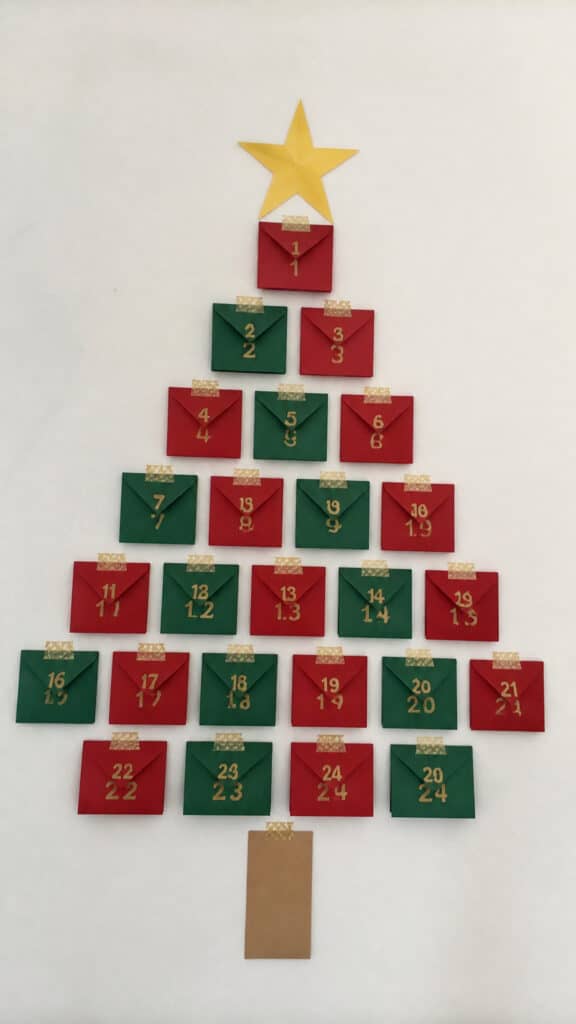
If you’re short on counter space like we always are, this wall-mounted DIY advent calendar is a total game-changer! All you need is 24 envelopes (I bought a pack of red and green ones at the dollar store), some washi tape or ribbon, and a wall you don’t mind putting a few pieces of tape on. The envelopes get arranged in the shape of a Christmas tree, and it looks absolutely adorable!
Start by numbering your envelopes from 1 to 24. You can use number stickers, stamps, or just write them on with a festive marker. Then, arrange them on your wall in a triangle tree shape – one envelope at the top, then two in the next row, three in the next, and so on. Use washi tape or small pieces of removable mounting tape to stick them to the wall!
Fill each envelope with flat treats and surprises. We do a mix of stickers, temporary tattoos, small notes with Christmas activities, chocolate coins, and even folded dollar bills for the older kids. The flat format means you can’t fit bulky items, but honestly, that’s kind of nice because it keeps things simple and affordable!
Add a paper star to the top envelope and maybe some garland around the edges if you’re feeling extra crafty. My middle son loves being the one to take down each day’s envelope, and we save them to reuse next year. This project literally took me less than an hour from start to finish, and it’s been a hit for two years running!
Matchbox Drawer Advent Calendar
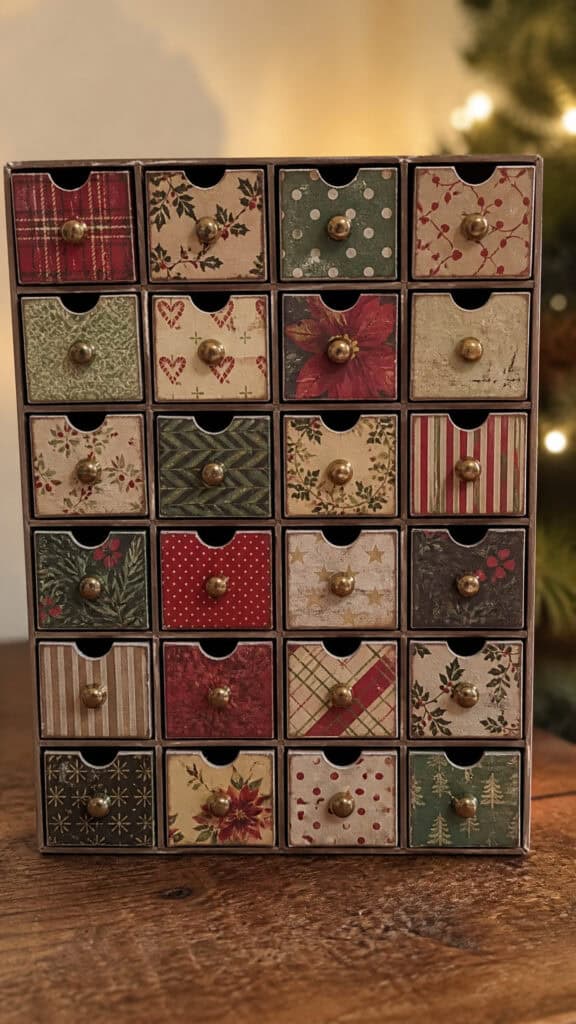
Okay, this one takes a tiny bit more effort, but it’s SO worth it and still totally doable in a weekend! I found a pack of 24 matchboxes at a craft store, and they’re the perfect size for creating a miniature drawer system. This DIY advent calendar looks super impressive but is actually pretty simple to put together!
You’ll want to remove the matches first (obviously!), then decorate the outer sleeves of each matchbox. I covered ours with scrapbook paper in different Christmas patterns – plaids, polka dots, and snowflakes. Glue a small number sticker or write numbers on each drawer. Then comes the fun part: arranging them into a display!
I hot-glued all 24 matchboxes together in a 4×6 grid formation, creating what looks like a tiny chest of drawers. You could also do a 3×8 arrangement or even stack them in a tree shape if you’re feeling adventurous. Once they’re glued together, the whole thing becomes one sturdy piece that you can display on a table or shelf!
The drawers are small, so focus on tiny treasures. We’ve done LEGO minifigures, small candy pieces, erasers, coins, and little folded notes with special privileges like “stay up 15 minutes late” or “pick tonight’s movie.” My boys think it’s like having a treasure chest, and they love sliding open each little drawer. This is definitely one of those projects that looks way more complicated than it actually is!
Tin Can Countdown Calendar
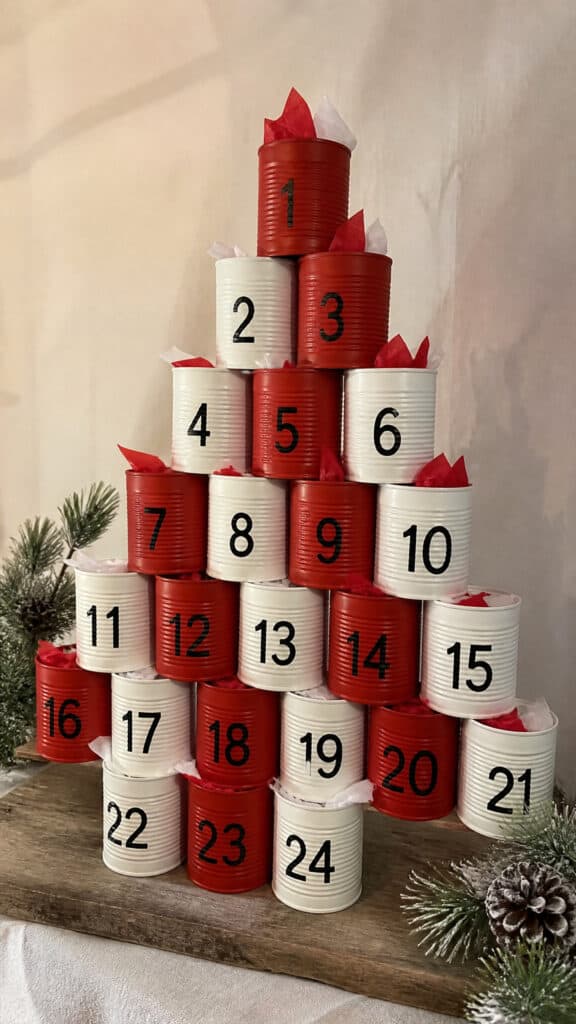
Don’t throw away those soup and vegetable cans! I started saving ours in October, and by November I had 24 clean cans ready to transform into the coolest DIY advent calendar. This project is perfect if you want something sturdy that’ll last for years, and it’s a great way to recycle!
First things first – make sure those can edges are smooth and safe. I used a can opener that removes the lid without leaving sharp edges, but you can also cover any rough spots with duct tape. Then it’s decorating time! We spray-painted half of ours in red and half in white, but you could also wrap them in wrapping paper, fabric, or leave them natural for a rustic look.
Once they’re decorated, add numbers to each can. I used vinyl number stickers because they look clean and professional, but painted numbers or even just marker works great too! Now for the display – you can stack them pyramid-style, arrange them on shelves, or do what we did and mount them to a board. I attached ours to a large piece of plywood using strong adhesive, creating a wall-mounted display that the boys can easily reach!
The beauty of tin cans is that they’re deep enough to hold bigger treats! We’ve fit small toys, full-size candy bars, and even rolled-up t-shirts in there. You can cover the open top with tissue paper or fabric secured with a rubber band to keep the surprises hidden. This has been our sturdiest DIY advent calendar yet, and I love that we’re reusing materials that would’ve ended up in the recycling bin anyway!
Clothespin and String Light Calendar

This might be my simplest DIY advent calendar idea yet, and it’s perfect for those of us who aren’t super crafty! All you need is a string of lights (I used a basic strand of white Christmas lights), 24 clothespins, and small bags or envelopes for the treats. The whole thing comes together in under an hour, I promise!
Start by hanging your string of lights wherever you want your calendar to live – across a mantel, along a wall, or even draped in a window. Then, fill 24 small bags or envelopes with your daily surprises. I used little organza bags from the craft store because they look festive and you can see hints of what’s inside, which drives my boys crazy with anticipation!
Number each bag from 1 to 24 using tags, stickers, or just writing directly on the bags. Then use the clothespins to clip each bag to the light strand. The lights shine through the bags at night, creating the prettiest glow! My boys love that they get to unclip their bag each day, and the display gets lighter and lighter as we get closer to Christmas.
This setup is also super flexible – you can easily adjust it to fit your space, and taking it down after Christmas takes literally two minutes. Plus, if you use regular clothespins, the kids can decorate them with paint or washi tape to make them extra special. We’ve done sports themes, superhero colors, and one year we even glued tiny pom-poms to each one. It’s such a fun, low-pressure project that still feels really special!
Muffin Tin Advent Calendar
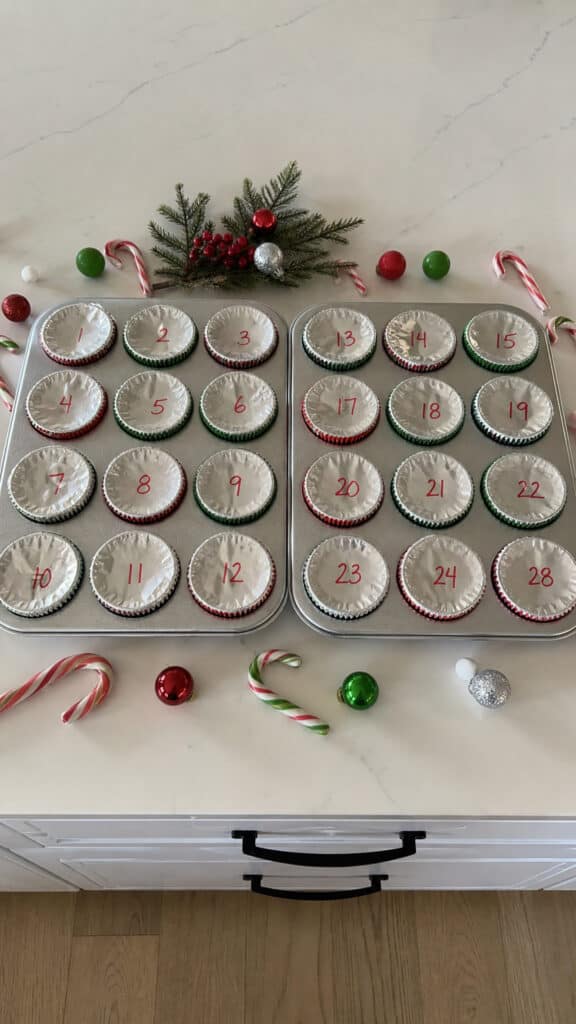
Here’s a genius idea that uses something you probably already have in your kitchen! A standard muffin tin has 12 cups, so grab two of them and you’ve got your 24 days of Christmas ready to go. This DIY advent calendar is perfect for smaller treats and is so easy to set up that even my most chaotic December morning can handle it!
Line each muffin cup with a festive cupcake liner – I found Christmas-themed ones at the dollar store with trees, snowflakes, and Santa designs. Drop your daily treat into each cup, then cover the top with aluminum foil or plastic wrap to keep everything a surprise. Number each cup from 1 to 24 using stickers on the foil or by writing directly on it with a permanent marker!
The great thing about muffin tins is that they’re contained and portable. You can keep them on the counter, in the pantry, or even in the fridge if you’re including treats that need to stay cool. Each morning, the boys peel back their numbered foil to reveal their surprise. We’ve done chocolate kisses, small toys, coins, dice, small cars, and even plastic animals – basically anything that fits in a muffin cup!
If you want to get fancy, you can paint the outside of the muffin tins with chalkboard paint or wrap them in decorative paper. But honestly? They look pretty cute just as they are, especially with those colorful cupcake liners peeking out. This is definitely my go-to recommendation for anyone who wants a DIY advent calendar that requires minimal craft supplies and maximum efficiency!
Felt Pocket Advent Calendar
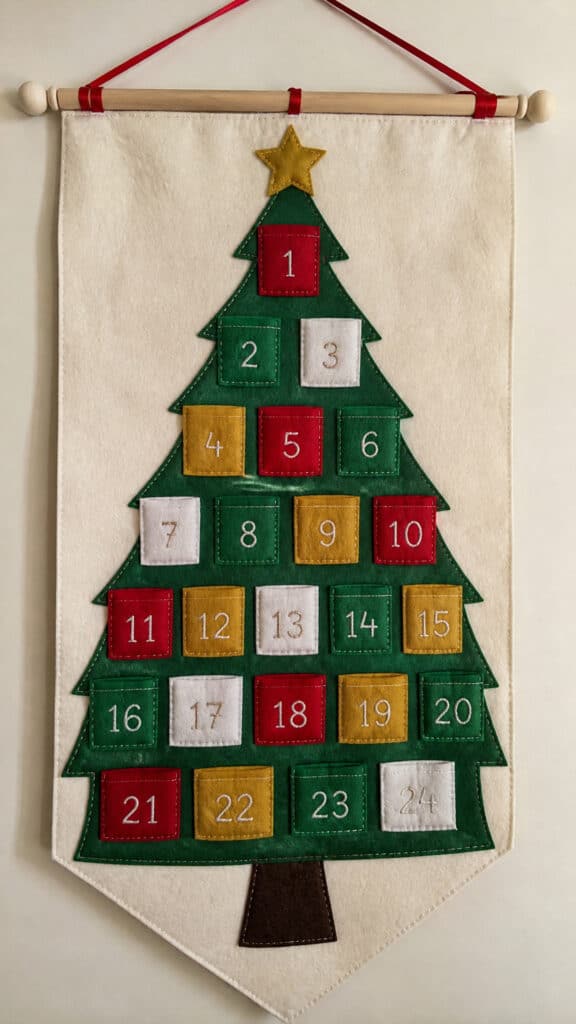
If you’ve got basic sewing skills (or even if you don’t!), this felt pocket DIY advent calendar is such a beautiful keepsake project. I made ours three years ago and we still use it every single December! You’ll need a large piece of felt for the background, smaller felt pieces for pockets, and either a sewing machine or fabric glue if you’re not into sewing.
Cut out 24 small pockets from different colored felt pieces – I made mine about 3×4 inches each. Arrange them on your large background piece in whatever pattern makes you happy. I did a Christmas tree shape with the pockets, but you could do straight rows, a wreath shape, or just a random scattered look. Once you’ve got your layout, sew or glue three sides of each pocket to the background, leaving the top open!
Add numbers to each pocket using felt numbers you cut out yourself, puffy paint, or embroidered numbers if you’re feeling really ambitious. I went with iron-on numbers because I’m all about shortcuts that still look good! Hang your finished calendar using a dowel rod slipped through a pocket sewn across the top, or just tack it directly to the wall.
The pockets are perfect for flat treats and small toys. We fill ours with stickers, temporary tattoos, small LEGO sets, folded activity cards, and flat chocolate bars. My favorite thing about this calendar is that it folds up for storage and has held up beautifully over the years. Plus, working on it while the boys were napping felt like such a special mom project – I loved knowing I was making something we’d treasure for years to come!
Making Memories One Day at a Time
Creating your own DIY advent calendar is about so much more than just treats and surprises – it’s about building those special holiday memories that your kids will remember forever! My boys already talk about which calendar they want to make next year, and I love that this has become one of our family traditions. The best part is that none of these projects require you to be a crafting expert or spend a fortune on supplies!
Pick whichever idea speaks to you, grab your supplies, and set aside a weekend afternoon to make some magic happen! Whether you go with the simple clothespin version or invest a bit more time in the felt pockets, your kids are going to love counting down to Christmas with something you made just for them. Trust me, the excited squeals every morning make every minute of crafting time totally worth it!